Kubota Sake Sandwich Bread
Hey everyone, hope you are having an amazing day today. Today, I will show you a way to prepare a special dish, Kubota Sake Sandwich Bread. One of my favorites. For mine, I will make it a little bit unique. This is gonna smell and look delicious.
Kubota Sake Sandwich Bread is one of the most favored of current trending meals in the world. It's simple, it's quick, it tastes yummy. It's enjoyed by millions daily. Kubota Sake Sandwich Bread is something which I've loved my entire life. They're fine and they look wonderful.
Many things affect the quality of taste from Kubota Sake Sandwich Bread, starting from the type of ingredients, then the selection of fresh ingredients, the ability to cut dishes to how to make and serve them. Don't worry if you want to prepare Kubota Sake Sandwich Bread delicious at home, because if you already know the trick then this dish can be used as an extraordinary special treat.
To get started with this particular recipe, we have to first prepare a few ingredients. You can cook Kubota Sake Sandwich Bread using 9 ingredients and 5 steps. Here is how you cook it.
Since I'm such a lightweight, I can't drink Kubota sake, but since I want to indulge in it, too, I made this bread.
I tried some fancy bread that used a 20-year-old sake lees called "kinsei" and loved it, and it got me interested in sake and sake lees.
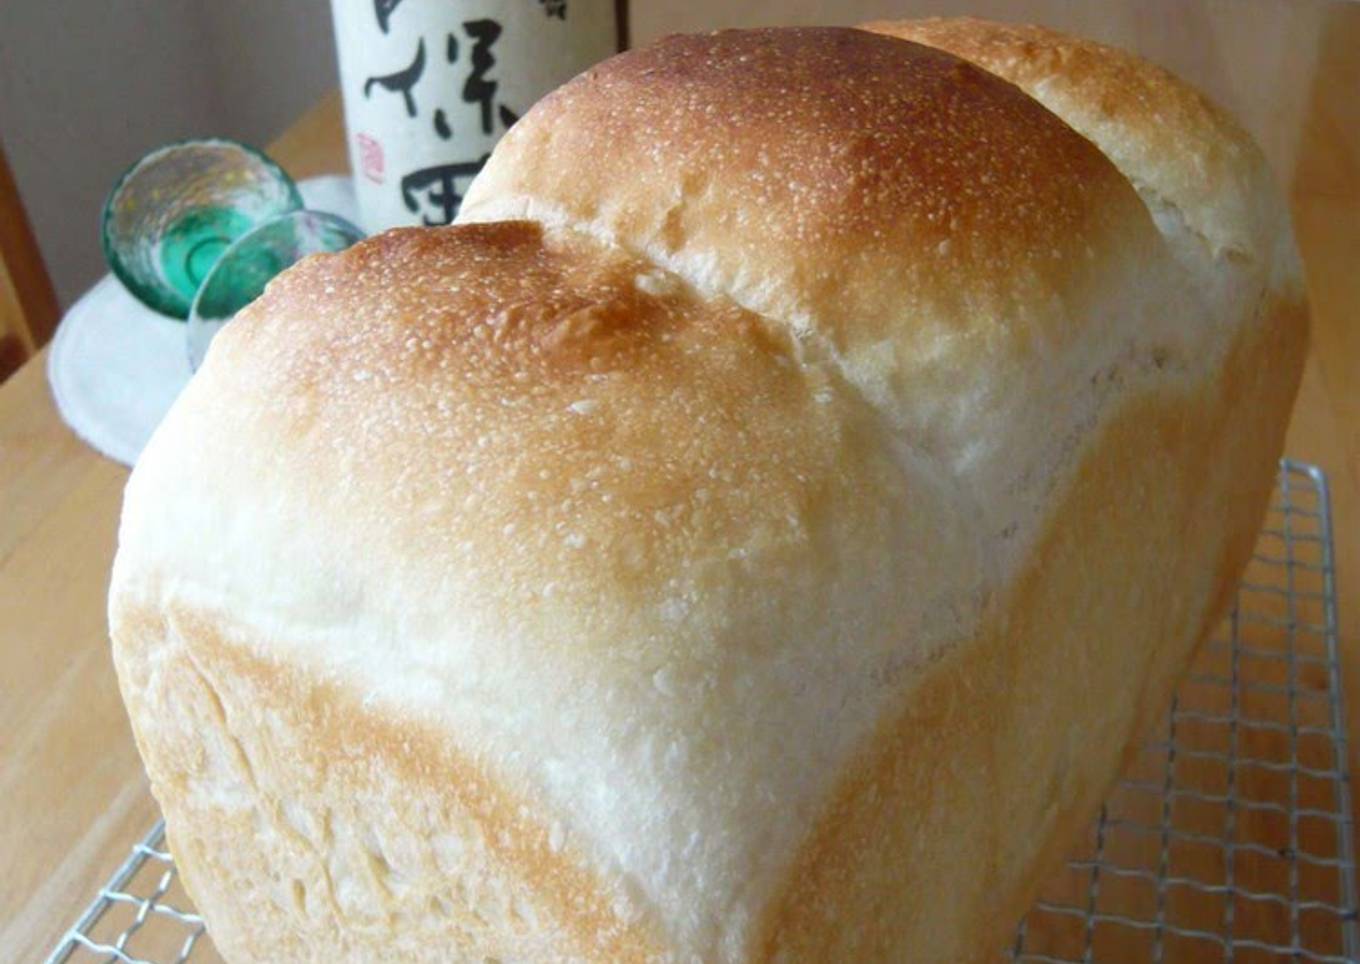
Be careful not to let the pot boil over when softening the rice. With the regular water content of sake and rice, the dough will be sticky and wet, so dust your work surface with flour, and reduce the amount of water. The photo shows the bread with 50% extra strong flour. Recipe by Osshosan
Ingredients and spices that need to be Get to make Kubota Sake Sandwich Bread:
- 60 grams ■ Plain cooked rice
- 80 grams ■ Water
- 300 grams Strong (bread) flour
- 24 grams Sugar
- 5 grams Salt
- 40 grams Sake (Kubota)
- 65 to 80 grams Water (in summer, use a small amount of iced water)
- 4 grams Instant dry yeast
- 18 grams Butter
Steps to make to make Kubota Sake Sandwich Bread
- Put the ■ ingredients in a heat-resistant bowl, wrap in plastic wrap, then microwave for 1 minute or more until boiling, wrap the bowl in a towel, and allow the residual heat to soften the rice.

- Add the rest of the ingredients to a bread machine, add the rice from Step 1, then add the butter. After 5 minutes, turn on the bread maker and wait until the first proving is complete.

- Punch down the dough, let sit for 15 minutes, fold the dough (by bringing the dough together from the outside to the inside, as if folding it) or roll into balls, then place inside a lightly oiled bread mold and allow it to rise for a second proving.

- Preheat oven to 190°C, bake for 30 minutes, then it's done!

- The sliced surface inside should be moist, chewy, and fluffy. Try this with your favorite sake.

As your experience and also confidence expands, you will locate that you have extra all-natural control over your diet and also adjust your diet plan to your personal preferences gradually. Whether you want to serve a dish that makes use of less or even more ingredients or is a little more or less hot, you can make simple modifications to achieve this goal. In other words, start making your dishes promptly. When it comes to basic food preparation skills for newbies you do not require to discover them but only if you understand some simple cooking techniques.
This isn't a full overview to fast and also simple lunch dishes but its excellent something to chew on. With any luck this will certainly obtain your imaginative juices moving so you can prepare tasty meals for your household without doing a lot of square meals on your journey.
So that is going to wrap this up with this exceptional food Steps to Prepare Favorite Kubota Sake Sandwich Bread. Thank you very much for your time. I am confident you will make this at home. There's gonna be more interesting food at home recipes coming up. Remember to bookmark this page in your browser, and share it to your family, friends and colleague. Thank you for reading. Go on get cooking!


Comments
Post a Comment